Showing posts with label Before and After. Show all posts

Tuesday, March 2, 2010

Before and After: School Room

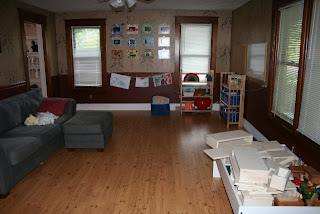
Totally embarrassing "before" picture. This was our guest/sewing/exercise room and this is what it looked like after I spent time sewing last week and the boys amused themselves with whatever they could find.


After! What a difference in 48 hours! I am in LOVE with this room now!

If you pop over to Flickr, you can read my notes. Enjoy the tour!


Such a peaceful and lovely space...just don't look at the master bedroom for a few more days until I finish weeding out what I don't need from the old room and cleaning off my sewing table!

Saturday, October 24, 2009

A New Look

As I posted a month or so ago, I've been having trouble with scratched corneas. After a recent eye exam (where the doctor saw three scars!), I decided to go "glasses-only" for the foreseeable future. My old glasses were ten years old since I've wearing contacts full time. I ordered some spiffy new ones and decided to get my hair cut too. My hair was nearing waist-length (can't find a recent picture where it's not tied back), and I wanted it just past my shoulders so I could still pull it back easily. My stylist got a little carried away, and it's much shorter than I wanted. I don't love it by any means, but I guess I'm used to it by now. Nothing to do by wait until it grows out!

Last November...


Last week...


Saturday, July 11, 2009

Before and After: Closet (Again!)

A few weeks ago, I decided I'd had enough of the growing disorganization in one of the closets. Its original purpose was storing off-season outerwear and extra picture frames, tablecloths, etc., but it's also morphed into storage for Montessori works, completed art projects, and other homeschool materials. You can see the way the closet looked after a bout of Lenten Cleaning a year and a half ago. Unfortunately, everything started to pile up and not only couldn't I find what I was looking for, I also completely forgot about some treasures!

So with an idea in mind of how I wanted to transform it, I set to work. Here's the before (I'm so embarrassed!):


After! All organized and much better!


Saturday, November 8, 2008

Playroom Tour

It's been a while, so click to see the "in progress pictures!"

A view of the whole room...
(I would like to point out that I took these photos at 9:30 AM after several hours of playtime and both boys are still in their pajamas!)


(Doorways to the kitchen on either side of this couch.)


(Felt board pieces made by the lovely Emma! DS chose that morning's design...note the leaves that have "fallen" from the tree!)

The foyer or "playroom extension"...
(The cozy corner is opposite this shelf. This is where I keep all our art supplies, DS's musical instruments, several of his Montessori works, and store the supplies for activities that aren't in use.)


(Our four-sided display bookcase also holds puzzles. The doors to the downstairs bathroom and the stairs are to the right of the rocking chair. The front door is to the left, and straight ahead, behind the gate, is the library/music room.)


There you have it! This room and the kitchen are where we spend most of our days!

Thursday, August 28, 2008

Before and After: The Playroom

This isn't a true before and after post as I didn't get the full "before" shot. It's more "during" and after. For my birthday last week, my DH decided to surprise me by taking up the carpet in the playroom and replacing it with hard flooring! As long-time blog readers know, I despise carpeting. I wasn't expecting this project to begin for several more years, so I'm thrilled to see our playroom/schoolroom come together the way I've wanted!

In the first shot, the playroom proper. It's mostly finished here except for replacing the baseboards. We decided not to strip the wallpaper and paint (neither of us feel up to that monstrous task), so the last remnant of "formal dining room" from the previous owners remains.

Looking from the playroom into the playroom extension (foyer) and through to the library/music room. Most of DS's toys are piled in there for the time being.


I anticipate that the entire project will be done this weekend, and I'll be back with more pictures our reconstructed and reconfigured room!


Oh, and we finished the fence two months ago...I'll post pictures (or a video!) of that too. Promise.

Monday, June 9, 2008

A Sneak Peak

One of our house projects this spring has been to fence in part of our yard. We have about 5.5 acres, and at least half that is "yard." Quite a large space to keep track of a very active toddler, especially on a busy road, so we decided to create a "play yard" of sorts to help manage outdoor playtime. We will be able to step right about the back kitchen door (being careful not to disturb the robin and hummingbirds)! It's actually quite a large space-- twice what we had originally planned-- and I think it's going to be a great help supervising our young children! My DH has done all of the planning and work himself!

Here's a look at our progress on Memorial Day weekend... he spent Sunday afternoon after church and on-and-off (between rain showers!) Monday working on it. Since then it's come along quite a bit and should be done this week.


(This is the front facing the road. The fence starts right at the front porch.)


(The section immediately following the one above. This has since been filled in.)


(The posts on the third side behind the swing set. See my new clothesline? DH built that early in May after the old one blew over and bent in half. I didn't take a picture of the back posts since they're mostly hidden by the maple trees.)

From there, the fence makes another turn to face the driveway (the gate will be in that section) then borders the deck before meeting the house. This is a great area because some or all of the yard is shady all day!

Monday, February 18, 2008

Lenten Cleaning: Downstairs Closets

I wrote out long descriptions of my work today but I lost it all, despite Blogger's claim it was saving my work. I'm far too tired to type it all again, so you'll have to use your imagination and trust me when I say things are in much better shape now.


I didn't take a before of this closet since all I did was add the basket on the top shelf to organize hats and mittens and bring shoe boxes over.


If I feel up to it tomorrow, I'll come back and add more information!

Friday, February 8, 2008

Lenten Cleaning: DVD Collection

Our DVD collection is housed in a corner of the master bedroom closet. We moved it in there and off a bookshelf almost a year ago, when a certain someone was going through a chewing phase and ruining the covers (it wasn't me!). We shifted some things around and moved the discs into a plastic Rubbermaid "bureau" that DH used for old sweatshirts. The drawers never worked right, though, and this morning when trying to put some DVDs away, I decided it was time for a change. I de-cluttered a small, folding bookshelf a few weeks ago (Freecycled old stationery), and it is the perfect size to tuck into the back corner of the closet!

Please forgive the picture quality. The closet is dark and fairly narrow, so it was hard to get full-length shots of the arrangement. I also had moved the new shelf into place before I thought to take pictures, so you'll have to use your imagination to imagine exactly what it looked like "before."


After (alphabetized of course):

As you can see, I had to do a little finagling to make everything fit. The top shelves are quite narrow and didn't allow for a double row, so I had to go vertical! I don't know how long the shelf will stay neat, but at least it's something to work toward.

Wednesday, February 6, 2008

Lenten Cleaning: Pantry

Today is Ash Wednesday, and I decided to kick off my Lenten cleaning with a bang! My laundry room/pantry has been spirling into disorganization for some time, and it was time to change that!

Here are the before pictures:

Long and narrow!

Curtains hanging to dry and all sorts of odds 'n' ends on top of the freezer!

My extras "just in case."


Cleaning supplies in a lower cupboard. Green and non-green products all mixed together!


Empty containers and little used items.

The Dramatic Transformation! Ta-da!


What a refreshing change!


Now it's much easier to see what I have on hand. The upper cupboards have a few more food items and baking pans. They were already in pretty decent shape.


Little-used chemical products (I can't seem to throw them away-- so wasteful!) are in the back and my vinegar, buckets, and cleaning rags are right up front.

Saturday, September 1, 2007

Before and After-- AFTER!

For reference, the "Before" pictures can be seen here.


Tuesday, August 28, 2007

Before and After, August 20-??

I didn't get very far with my "before and after" project last week, but this week I am determined. I was probably a little too ambitious, but this entire room has been bugging me. I'm trying to create a workable toy rotation and storage system for all of the Little Guy's toys. This is technically our dining room, but we're using the space as a family room.

Here's what the situation looks like currently:


In a few days, I should have very different pictures to share!